2 Main Causes of Irrigation Water Problems

What Causes Water Quality Problems in Irrigation?

Commercial Irrigation.jpg

Problems with water quality in horticulture is an ongoing battle that has escalated over the last decade. The threat of pathogens and algae in irrigation water is something that all farmers have to contend with on a daily basis. And, as with any battle - there are some winners and some losers. Let’s shed some light on the basics of cause and effect to make this ongoing dilemma simpler to solve. Let's look at what contributes to the water quality of commercial irrigation.

  1. How Do Droughts Affect Irrigation Water Quality?

At any particular time, some part of the US, and the planet for that matter is experiencing a major drought. And in states like California that provide fruit and vegetables for our entire country, a significant drought like the one during 2012 to 2016 can be devastating to both growers and consumers.

Although the 2012-2016 drought in California has officially ended, other parts of the western US are still experiencing extremely dry conditions. Take a look at this continuously updated US Drought Map issued by the United States Drought Monitor.

During droughts, local water-management authorities are forced to regulate and restrict irrigation supply and agriculture runoff. So, unless modern farmers use technology to their advantage, water restrictions resulting from drought conditions can push them out of business.

Droughts create a water scarcity, which drives up the price for both the farmer and consumer. If farmers choose to cut costs in their water treatment systems, crop vitality, and quality decline and consumer health concerns arise.


2. Add The Key Facts of Urbanization

More people are moving to big cities like NYC or New Jersey where fresh produce is hard to find in the winter months. Or Las Vegas where water is scare year round. As urbanization increases, the problem of having enough fresh fruits and vegetables for the millions of city dwellers is becoming more evident.

Urbanization and Vertical Farming.jpg

Not everyone lives in California’s Central Valley where fresh fruits and vegetables are readily available year-round. For consumers in large cities or on the East Coast, the delivery of their “fresh" vegetables” may have taken several days or weeks which drastically shortens shelf life.

Consumers are becoming more concerned about the safety of the fruits and vegetables they’re purchasing.

Here’s what the USDA has to say in their article: Foodborne Pathogens Associated with Fresh Fruits and Vegetables.

“The U.S. Public Health Service has identified a number of microorganisms associated with foodborne illness that are notable either because of the severity or because of the prevalence of the illness they cause. Foodborne microbial pathogens associated with the consumption of fresh fruits and vegetables include"

Brought to you by USDA's Economic Research Service

Brought to you by USDA's Economic Research Service

  • Cyclospora cayetanensis

  • Escherichia coli

  • hepatitis A virus

  • Listeria monocytogenes

  • Norovirus

  • Salmonella

  • Shigella

This article tells us that no matter our growing method, open air, greenhouse, hydroponics, vertical farming, or alternative we have a responsibility to ensure the fruits and vegetables we grow are safe.


Increased Demand for Organic Produce

Consumers want what consumers want. And for over 30 years it’s been organic. Here’s a quote from the article “Organic Market Overview”:

“Fresh fruits and vegetables have been the top-selling category of organically grown food since the organic food industry started retailing products over 3 decades ago, and they are still outselling other food categories, according to the Nutrition Business Journal. Produce accounted for 43 percent of U.S. organic food sales in 2012.”

Organic Lettuce .jpg


Goals & Priorities of Effective Water Treatment

The goal of modern farmers isn’t to sterilize their water. They understand that many microorganisms are beneficial to both humans and plant growth. The real goal is to reduce the risk of pathogens. At Voeks, Inc. we work to do this within the budget of the grower.

We look at the grower’s location, current irrigation system, sources and quality of water and go from there.

As with any project, it’s good to start out with a list. Here is a water quality checklist from UMass Amherst - the Center for Agriculture, Food and the Environment. See what points you already have in and what you need help with.

CHECKLIST WATER QUALITY FOR CROP PRODUCTION

Have water tested at a laboratory that is equipped to test water for irrigation purposes. Irrigation water tests should always include pH and alkalinity.

Reclaimed water, runoff water, or recycled water may require reconditioning before use for irrigation since disease organisms, soluble salts and traces of organic chemicals may be present.

Water quality should be tested to ensure it is acceptable for plant growth and to minimize the risk of discharging pollutants to surface or groundwater.

Use filtration to remove suspended solids from water to prevent clogging of piping, valves, nozzles, and emitters in an irrigation system. Suspended solids include sand, soil, leaves, organic matter, algae, and weeds. Water pH may need to be adjusted before being used for mixing some pesticides, floral preservatives, and growth regulators.

Reference: UMass Extention 2018 Water Quality for Crop Production

Get Your Free 15 Minute Consultation Today

Call 408-332-9635 or contact us online. The team at Voeks, Inc. is here to help you grow.

How to Control Media pH and EC for Healthy Plants

pH and EC Control.jpg

Why is Media pH and EC Important in Plant Nutrition?

Springtime doesn't just bring new growth. It also brings calls from growers who are worried because their plants aren't doing well. They're dealing with stunted growth and yellowing leaves. At Voeks Inc, we find the majority of their problems come from two things: the media pH and/or media electrical conductivity (EC) values are off.

To have healthy vibrant plants, you must monitor media pH consistently. This pH shows how much nutrients are available to the plants. Levels that are too high from fertilizers can lead to overgrowth, runoff and nutrient toxicity. On the other hand, levels that are too low have other problems like nutrient deficiencies and weak plants that can't defend themselves against pests.

When the media pH is within the acceptable range, you'll have controlled growth and healthy plants.

Media EC shows the electrical conductivity of the plant. If there's too little EC, the plant will run out of energy. And if there is too much EC, there can be too much growth, plus the roots of the plants can burn.

So, it's vital that you are continually measuring media EC. Otherwise, you're just waiting until the plants show symptoms and that can be too late.


What Four Factors Affect Media pH?

When you know what elements affect the pH in peat-based media, you can have more control. They are:

  1. water alkalinity level

  2. amount of lime

  3. type of fertilizer

  4. plant root condition

Water Alkalinity: Because water is the most applied substance to any plant, the most critical factor isn't the pH, it's the alkalinity level of the water. Similar to adding lime to the media, watering increases the pH in the media. Optimum levels of alkalinity for plugs are 60 to 80 ppm. But, for larger containers and bedding plants 80 - 120 ppm is better.

Make sure when you use any type of acid injections, to test the alkalinity levels of the water every week along with the pH. Take a look at your injectors too and make sure they stay in top condition. Along with those weekly tasks, make yourself a reminder to have your water tested by a reputable laboratory every six months.

Lime Amounts: When peat-based media has a very low pH - add lime. The ideal growing range is 5.5 to 6.5. Adding the correct amount of lime adjusts pH. Overall, crops do not do well at lower pH ranges of 5.0 to 5.2.

Three types of lime you can use are calcitic, hydrated, or dolomitic.

  1. Calcitic does an excellent job of nutreulzing soil acidity. Compared to hydrated lime, it lasts longer and reacts slower.

  2. Hydrated lime is useful if you need something that responds quickly, but the downside is it doesn't last very long.

  3. Dolomitic lime comes from deposits of calcium carbonate combined with magnesium, so it has the added benefit of the plant nutrient magnesium.

How quickly the pH will increase depends on the lime's particle size and amount applied. Lime activation will increase with water frequency.

Fertilizer Type: All fertilizer elements have the effect of either lowering or raising growing medium pH. This is especially true for nitrogen.

  • Phosphorus and ammoniacal nitrogen have an acidic reaction. These types of fertilizers bring on the soft growth of leaves and shoots quickly.

  • Nitrogen and calcium can increase the media pH, plus these elements also promote more toned shoot growth and healthier root growth.

No matter what fertilizer you choose, keep a close watch on the pH range and how your plants are doing. Adjust accordingly.

Root Condition: Did you know that plant roots can affect the pH media?

  • Vinca plants can suffer from micronutrient deficiency because of increased pH.

  • And geraniums have the problem of lower leaves getting micronutrient toxicities caused by lower media pH.

  • When root systems are older, the pH can change, so it's wise to continue testing.


What Affects Media EC or Soluble Salts?

It is vital to regularly test media EC - electrical conductivity to adjust your fertilizer programs and monitor soluble salts. This applies to high tunnel or greenhouse plants grown in soil such as ground beds or raised beds or grown in soilless media in containers.

Some of the main things that can affect EC are:

  • Quality of water

  • Starter fertilizer charge

  • Fertilizer rate and type

  • Media components

  • Techniques used for watering

  • Overall environment

  • The age of plant roots

The quality of the water is the most critical place to start. Conductivity should be under 0.75 µmhos. Monitor EC levels after using any fertilizers especially liquid ones. For example, if the water is 1.0 µmhos or more, electrical conductivity will be even higher with the addition of fertilizers.

If you're using a commercial mix, these have a starter charge in them. This charge aids initial growth during the first week after transplanting or sowing. So this means that when you measure the EC initially from the bag, you're really measuring the starter charge along with the gypsum or lime.

The combination of what's in the media determines the CEC or cation exchange capacity. CEC measures how many cations can be retained on surfaces of soil particles. It's really measuring how well the media hangs onto nutrients.

Fertilizers are composed of soluble salts.

Media-EC-Soluble-Salts.jpg

So, while the crops are growing media EC is determined by:

  • which fertilizer you choose

  • how much ppm you apply

  • how often you use it

  • watering technique

Regular leaching is essential. Otherwise, salts will be built up near the bottom of the container. This will damage the roots when they enter that area.

How you water the crop will influence EC levels. If you do not leach on a regular basis, salts will build-up towards the bottom of the container and cause damage to roots when they enter that area.

And, when it comes to older roots, soluble salts don't have as big of an effect so there can be less root burn and rot.

The Importance of Weekly EC and Media pH Testing

At Voeks, Inc. we advise all the growers we work with that it's a best practice for them to do their own media pH and EC testing weekly. This should be done on all of the main crops. Doing these tests yourself will save a lot of money. Staying on top of this testing helps prevent any big unforeseen problems from creeping up. Should issues arrive, or if you want to change something significant like your fertilizer program, go ahead and use a reputable testing lab for a complete tissue and media analysis.

If you're using a commercial mix, take a sample right out of the bag. If you have your own custom mix take the sample from the hopper before sowing or planting. To get an accurate reading of the lime's effect on the media - after you water the trays or flats for a week or two - take a sample. For this test - during those few weeks just use water no feed. It will give you a good gauge of how the lime will affect your media pH.

After these initial tests, test the principal crops weekly to avoid any future problems. If issues arise with other crops, go ahead and test those.

It's best to have one person on your team do the testing at the same time each week with the same methods. This way you're not entering in any unknowns. Here are the two most used methods:

SME Method - saturated media extract is used by most commercial labs and the recommended way for soilless greenhouse media. The test is done by making a paste with soil and water. Next, the liquid is then separated out so the pH, soluble salts and nutrients an by analyzed. This type of test is for larger growers who can afford a lab and tech trained personnel.

2:1 Extraction - If you don't have a big operation with an onsite lab but want to do occasional testing, this is the way to go. 2:1 extraction is a favorite method to test pH and soluble salts. Take a sample of air-dried soil, add water, and mix together. Use 2 parts soil and one part water. Next, separate the liquid out, by pouring it through a filter. You can use a regular coffee filter. Now, test the fluid.

Next, graph your pH and EC results so you can see what's happening from week to week.

  • Overall, is the media pH decreasing or increasing?

  • Is the EC going up or is it changing all over the place?

Make sure you don't over-react to one measurement. It's normal for ED levels to fluctuate quite a bit depending on when you took the sample. Two to four hours after feeding, EC will be higher vs. one day after feeding. That's why consistency in the timing of the tests is vital.

Choosing the right measurement equipment depends on your budget. For only about $50 you can pick up a pocket pH and EC meter. They're not perfect and won't last forever but, they are affordable.

If you have a larger budget, more accurate meters can go up to $1000+. No matter what you choose, make sure you calibrate your meter weekly before you use it.

If you're not sure what type of testing equipment you should use, give us a call, and we can give you some suggestions.

How You Can Correct EC and Media pH Problems

Testing weekly will keep you ahead of the game and most problems. But you can still have some issues creep up. Here are some common ones:

High media pH - younger leaves have yellowing or lateral branching and tip abortion. Yellow leaves are most likely from a deficiency of iron, and lack of boron may be the cause of the tip abortion. Both of these problems come from high media pH. Here are ways to fix these problems:

If you're using acid injection already add more acid. For one week, either bring the water pH down to 3.0 or the alkalinity to 0.

You can also use an acid fertilizer one or two times, (21-7-7 at approx 200-250 ppm). Watch out and control too much growth with this method.

You can create an iron sulfate drench of one to two pounds per 100 gallons. The solution should have a bluish color and be dissolved. After the drenching, be sure to rinse off your plants.

Acid injection does a good job controlling alkalinity in the long run. Make sure you monitor your mix for lime amounts.

Low media pH - lower leaves have stippling, marginal burn or necrotic spots. The other thing that can result in is stunted growth and overall yellowing. Micronutrient toxicity with zinc, copper, manganese, and iron cause lower leaf problems. Too little calcium results in stubbing root tips, significant stunting, and tip abortion. Here's how to fix low media pH:

If you're using acid injection, turn the acid off. This will raise alkalinity and media pH.

Use a fertilizer that's a 15 -0-15 or 13-2-13 once or twice (200 - 250 ppm). What's nice about these fertilizers is you won't have to worry about too much top growth.

Make a lime drench of 4 quarts to every 100 gallons along with getting enough volume through the pots. Avoid any build up on the leaves by rinsing the plants with clean water afterward.

Make a potassium bicarbonate drench at 2 pounds per every 100 gallons. And just like the lime drench get enough through the pots. Afterward, make sure to rinse the plants. In a few days, add a fertilizer with some calcium.

Adding lime or readjusting the acid injection can get alkalinity into a good level on a long-term basis.

Problems with high media - a few ways to know if you have a problem is if there's root tip damage or increased root rot. Along with that be suspect if you have too much top growth.

Avoid high EC levels if you're a dry grower. If you let the plants dry down too far, you'll find ED levels building up three to four times near the roots. Some crops that commonly have high EC levels are

  • penta

  • impatiens

  • vinca

  • pansy

  • primula

Here are some ways to correct EC issues:

  • You'll want to obtain and 10% to 20% run through so make sure you water the container thoroughly. Don't water lightly, this is important when you're feeding, or the water has high EC levels.

  • Until the roots are more established and developed, use lower levels of any fertilizers.

  • If your temperatures are under 60° F, don't use fertilizers with high ammoniacal and nitrogen because it causes toxicity.

  • Reduce CED by adding some perlite into your mix. This will also improve drying and air porosity.

  • Improve the water you're using, change to reverse osmosis, rainwater or even city water if it's better than what you're already using.

  • Test regularly by using EC and pH meters. This will give you more control, so you're not just coping with problems after they arise.

Get Your Free 15 Minute Consultation Today

Call 408-332-9635 or contact us online. The team at Voeks, Inc. is here to help you grow.

How To Design a Successful Water Treatment System

Effective Water Treatment Systems.jpg

The Essentials of Effective Water Treatment Systems

Growers, farmers, processors, and even designers along with engineers often fall into the trap of searching for the silver bullet. We seek that one game-changing component that will propel us all to the next level. No doubt, over the last several years, modern farming has experienced several monumental changes including: 

Although, looking back over our years of experience with alternative farming methods, the important changes haven't necessarily been the biggest or most unique.

They've been basic.

I'm talking about those relatively small shifts in modern farming and water treatment that at first don't receive very much attention. But, in hindsight, these small changes, make a significant difference.

Years ago, when starting Voeks, Inc., I recognized the best way to grow our business was with small carefully-chosen improvements. Little-by-little these improvements would compound to make quite a difference. For us, it meant our own growth was smooth and stable.  As a team, we preferred this conservative method as compared to making one large sweeping change that was riskier in hopes of a tremendous result. For example: implementing new technology too soon before we've had time to do our due diligence.

Growing a business is incredibly similar to growing plants. You make each decision hoping to achieve the desired result. As growers you're able to produce hundreds of thousands or millions of units in your facility. Because of that, you can receive exponential traction with even the smallest improvements. When you make several successful changes, your bottom line improves. For example what if you had an increase of

  • 3% faster germination in plug flats

  • 3% reduction of plant finishing time

  • 3% reduction of plant loss from disease

  • 3% reduction of fungicide use

Each change by itself isn't that impressive. But what about combined? Now that could impact your bottom line in a good way.


The Amazing Benefits of High-Quality Water

Commercial-Water-Treatment-System.jpg

As growers and urban farmers, we know that everything begins and ends with the quality of water. It impacts almost every area of production and is the most broadly applied substance. Even the smallest percentage of improvement can reap huge rewards.

Modern farmers see the benefits of improving water quality. They know that investing in a water treatment system pays off big in terms of healthier plants and higher yields.


Advantage of Cleaning up and Improving Water Quality

There are lots of articles about traditional water treatment like pH adjustment. So instead of talking about that, let's look at the beneficial side of actually improving the quality of water.

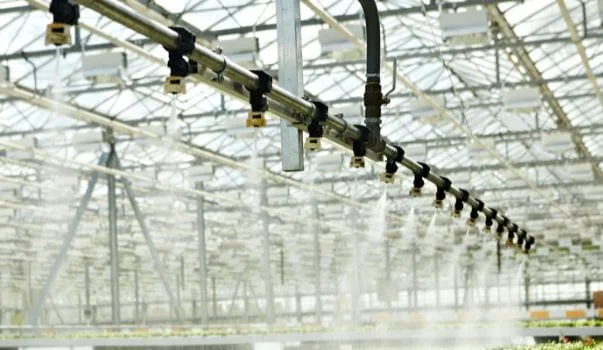
Voeks, Inc. has visited farms all over the country from California to New York City. From the traditional open air to greenhouses, and vertical farms it's quite common that we find the design of the irrigation systems to be lacking. Rather than an effective custom system designed specifically for the crop, location, and current water quality, we often find irrigation put together without an overall plan in mind.

So of course, the production suffers. And the farmers are not as profitable as they hoped to be. We change that.


Attention to Quality - One Drop at a Time

Successful water treatment design, build, and implementation requires incredible attention to detail in multiple areas. The subject is complex.  Unfortunately, there is no one-size-fits-all solution.

In designing any effective irrigation system, whether, for vertical farming, container farms, or greenhouses, there are vital things  to consider.

What's the source of the water and what is the best treatment?

Water comes from different sources.

  • municipal water supply

  • well water

  • surface water

Each of these sources has their individual challenges. Currently, there are dozens of successful treatment methods that can be used at or away from the source. These methods mainly reduce or get rid of pests like algae or remove excess pathogens and particulates.

Filtration always comes first. An effective downstream system removes as much organic and inorganic particulate as possible. Filtering as much as possible before going onto other systems downstream is always more cost-effective and less problematic. It's more expensive and less efficient to use poorly filtered water.

When water is successfully filtered, you can avoid the problems of

  • disinfecting entire systems

  • plugged acid injector ports

  • plugged fertilizer ports

  • fouled pH, EC sensors, valves

  • clogged emitters

The most common problem we see find when it comes to failed disinfection systems is, the water is inadequately filtered. The farmer in hopes of improving his crops has spent his hard-earned money on a system that isn't doing a good job. We can help.

A good rule is to go with the finest filtration possible.

The finer, the better. Go for as much as you can afford, even if you have to finance it. Make sure the filtration is at least fifty microns and go all the way down to five microns if possible.

Although it may cost more up front, it will pay off in the long run. Of course, your water source will determine the cost and type of filtration. But the more organics and inorganics you can filter out, the better.

After the water has been thoroughly filtered, then it can be disinfected more cost-effectively. If your water isn't filtered well before cleaning, you're throwing away your money and opening yourself up to a lot of headaches.

After the filtration stage, there are various options for disinfecting source water including: 

  • ozone

  • heat pasteurization

  • hydrogen peroxide

  • UV light

  • chlorine dioxide

  • chlorine

Once your water has been filtered, disinfected, sent through the RO unit,  had the pH adjusted, and is injected with fertilizer; don't think you're finished. Now it's time to tackle your biggest nightmare.


Why is Biofilm Such a Huge Widespread Problem?

Every nursery and greenhouse grower has issues with biofilm in their pipes. 

What is biofilm anyway?

"Biofilm is a thin, slimy film of bacteria that adheres to a surface."

Why is biofilm such a problem? Well, here's a quote from the article "Study of Biofilm in Bacteria from Water Pipelines" from the Journal of Clinical & Diagnostic Research:

"Any microbe including primary and opportunistic pathogens present in water may attach or become enmeshed in the biofilm."

That one line says it all and shows why it is the cause of a high percentage of illness. And we're not talking about untreated water either. Biofilm is happening in municipal water that runs through clean pipes and has already been treated by filtration and chlorination.

So if that's happening in our cities, it makes us shudder to think of the condition of nursery and greenhouse pipes. These pipes transport various fertilizers and are exposed to both heat and light - perfect conditions to feed the ever-growing biofilm.

So even if you filter and clean up your water at the source, you had better make sure you take care of the biofilm, or you still have a huge problem.

Here are two vital facts to know about biofilm:

  1. It grows within seconds, even in a new pipe or chlorinated water

  2. It increases almost as quickly upstream or downstream

That means, microbes on your boom nozzle, hose end, or in your greenhouse will quickly be growing in your pipes and the onto your plants. 

What type of microorganisms are we talking about?

  • Fusarium - a large variety of fungi that causes infections in humans

  • Rhizoctonia - attacks roots and causes root rot

  • Phytophthora - a soil-borne pathogen that can wipe out crops

  • Pythium - plant parasite that infests cutting beds and kills plants

Nothing to fool around with and definitely not something to neglect.

Here's how it works - the biofilm matrix secrets a sticky polymer substance onto the surface of the pipe. The material is firm and stubborn to remove.  It grows thicker extremely fast if not eliminated successfully.

Since this problem can grow both upstream and downstream, you can't just treat the source water.

To successfully get rid of biofilm you must ensure these three things are present:

  1. The water treatment must be capable of carrying a residual effect downstream that is capable of attacking and quickly removing the biofilm matrix. This eliminates many water disinfection systems that may have been adequate for cleaning the source water, including filtration, heat pasteurization, and UV light. If the treatment isn't capable of carrying a residual, it must not be used because it will not be effective against the biofilm matrix.

  2. The water treatment must be capable of completely destroying the biofilm matrix. If the matrix isn’t removed, although a few residents of the biofilm may be eliminated, the majority are still there and will quickly rebuild, and continue to cause problems. This reduces some additional disinfection candidates because, although they may establish a residual under the right conditions, they are ineffective at penetrating and destroying the matrix that is the biofilm. Both copper ionization and chlorine (even at very high concentrations) are eliminated because they fail to kill the biofilm matrix.

  3. Since the biofilm matrix begins building within seconds of a pipe, an adequate water treatment needs to be capable of continuous treatment and injection. Because of that, shock treatments with peroxides, acids, and flushing are not sufficient.

So what is the solution? There is no "one solution." It takes a custom water treatment consisting of one or more of:

  • Ozone (this is our favorite)

  • Activated Peroxygen (works pretty well, has some restrictions)

  • Chlorine Dioxide (is capable with some limitations)


Healthy Plants Can Defend Themselves

When plants are feed clean water, treated correctly, they thrive and are healthy. In fact, they can defend themselves against pathogens and pests.

At Voeks, Inc. we help you produce healthy vibrant plants that can defend themselves against problems whether from the air, soil, or water. If plants aren't susceptible to infection, they don't attract pests and are able to survive any problems successfully.

An effective and well-designed water treatment system does two things.

  • First, it effectively cleans and filters water at the source.

  • Next, it makes sure the biofilm doesn't spread and is destroyed. No treatment can be called effective if it doesn't do both.


Protect Plants and the Environment

Safe-Water-Treatment-Systems.jpg


Rather than using toxic chemicals such as chlorine and chlorine dioxide which stress the root system and harm plant health, modern farm tech utilizes safer oxidizers such as ozone and peroxygen. This type of treatment enhances plants and makes them healthier.

That's what, Voeks, Inc. does. We work with you to make your plants healthier. We specialize in designing, building, and installing high-quality custom water treatment systems that will help your plants and your bottom line.

Clean water produces better germination, faster and more root mass, which results in healthier plants. You'll also use fewer chemicals. Does all of this sound complicated? Well, it is. But, we are here to help you by designing a customized water treatment system that will do what it's supposed to along with increasing your bottom line.

Get Your Free 15 Minute Consultation Today

Call 408-332-9635 or contact us online. The team at Voeks, Inc. is here to help you grow.

8 Things to Know About Disinfecting Ozone

Ozone Postharvest Application Tips

Ozone Disinfection Argus.jpg

Ozone has been used for many postharvest applications such as cold room air treatment and even water sanitation. But, what about using ozone for disinfecting fresh fruits and vegetables? Well, the subject of ozone processing has been a favorite topic of fruit and vegetable processors as well as shippers for over two decades. Read on to find out more. 

Since ozone has achieved the status of GRAS - Generally Recognized as Safe, some processors and produce handlers are considering its application for both whole and peeled produce. To date though, the FDA still hasn't given their stamp of approval. 

Neither the EPA - US Environmental Protection Agency, or the DPR - California Department of Pesticide Registration show any registered postharvest use of ozone. Other conventional treatments like sodium hypochlorite, chlorine gas, and calcium hypochlorite are recorded.

The EPA Office of Pesticide Programs has put out a very informative summary called Label Review Manual which goes over what a pesticide is, classifications, precautions, and directions for use.  


  1. How Ozone Works in Water Treatment

Ozone is a natural and robust disinfectant. For years, it has been used safely in water treatment for:

  • bottled drinking water

  • water processing

  • municipal water

  • swimming pools

More recently, this naturally-occurring oxidizing agent is being used for wastewater treatment and has been used in: 

  • hospital equipment and water systems

  • dairy and swine effluent

  • cooling towers

  • aquariums and water theme parks

  • spas - both commercial and in-home


2. At What Levels Are Ozone Sanitation Effective?

Ozone sanitizes clean potable water very effectively. When water is safe to drink, use in food preparation, along with being free of soil particulates and organic debris - ozone works well. 

Here are a few more facts about ozone:

  • At 0.00003g/100mL at 20 degrees C [68 degrees F], it's almost insoluble in water

  • The concentrations should range from 0.5 to 2 ppm.

  • Ozone is almost insoluble in water (0.00003g/100mL

  • For antimicrobial activity, there must be effective dispersal

  • When water pH is 6 to 8.5 ozone's disinfectant activity is unaffected


3. Ozone Cautions and Concentrations

Here are precautions to keep in mind

  • a prolonged concentration of above 4 ppm is lethal to humans

  • it can also damage equipment because it is highly corrosive

  • levels of 0.01 to 0.04 ppm is detectable by smell

  • OSHA has limits for continuous exposure during 8-hours at 0.1ppm

  • The OSHA limit for a 15 minute period is 0.3ppm

  • At 1 ppm levels, it smells, and it can irritate the throat and eyes.

For open process lines, there may or may not be a need for gas-off containment. Each situation would need to be evaluated. Currently, it is difficult to maintain safe and effective concentration levels because of the unreliability of automatic detection systems. 


4. Historical Results Are Difficult to Evaluate

It's often difficult to evaluate past ozone studies because it is hard to reproduce the previous results. That is most likely because of variations in the ozone delivery system, whether it was commercial or experimental, and the concentration reported. 

There is new technology like electrode probes and colorimetric analysis kits that more accurately monitor ozone concentration. Although these methods can measure (ORP) oxidation-reduction potential more accurately, they still are not foolproof. 


5. Where Does Ozone Come From?

Ozone is formed in nature when lightning interacts with the UV irradiation of the sun. It can also be produced commercially with UV generators.  These machines pass ambient air across a UV light source. There are different types of ozone machines with varying costs. For example:

  • UV-based generators move ambient air (typically 78% nitrogen and 21% oxygen) across a UV light source that is usually less than 210nm. This type of system costs less than a Corona discharge, but it also has less output.

  • Corona discharge generators are mainly used by industrial and commercial applications. There are unlimited variations of this type of ozone generator. It works like a spark plug. When dry oxygen (O2) passes over high voltage of more than 5,000 volts, ozone (O3) results. To prevent personal injury or corrosion, any excess ozone must be gathered and destroyed.


6. How Water Quality Impacts Ozone Effectiveness 

The antimicrobial action of ozone works best in clean water. When water has suspended inorganic and organic substances, these particles react with ozone, and the desired antimicrobial result does not occur. 

The quality of the water being used has a critical impact on the ozone's stability in water and ozone demand. Here are a few examples of dissolved minerals that will interfere with the production of ozone:

  • nickel

  • copper

  • manganese

  • iron

Additionally, if there is ammonia or hydrogen sulfide in the water, the process will take longer and be less effective. 

If the drench tanks or flumes contain high suspended solids, there can be less than the expected reduction of microbials. 


7. Which is More Effective - Ozone or Chlorine? 

Voeks, Inc., believes ozone is the clear winner here with one-and-a-half times more oxidizing potential than chlorine. Plus, it works four-to-five times faster. Compared to chlorine, ozone is more effective on plant pathogens and bacterial cell walls. 

Although ozone uses about five-times more energy than chlorine gas, it still uses about twenty-five times less than chlorine dioxide. 


8. More Postharvest Uses For Ozone

For years, the efficacy of ozone on disease control postharvest has been a hot topic.

A few commercial growers have had success on the following crops:

  • potatoes

  • onions

  • cherries

  • carrots

  • apples

The modern farmer is showing more interest in using ozone for both air and water treatment. Some of the current uses are:

  • odor elimination

  • humidification disinfection

  • storage room fungal spore removal

  • onion superficial mold treatment

Certain plants such as carrots and grapes experienced better disease control. There have also been instances of plants natural defenses improving, and them becoming  more disease resistance

Although more study is needed, the potential of ozone's disinfectant properties for fruit and vegetable crops postharvest looks bright.

Get Your Free 15 Minute Consultation Today

Call 408-332-9635 or contact us online. The team at Voeks, Inc. is here to help you grow.


Greenhouse Boom Irrigation

Commercial Boom Irrigation.jpg

Greenhouse Boom Irrigation Systems

Uniform watering is the one vital key to thriving plug and cell pack production. This cannot be achieved with hand watering or conventional overhead irrigation using nozzles with a circular pattern. Advances in boom irrigation technology give you a production tool that can be applied to your existing greenhouses or to new construction.


Types of Greenhouse Boom Irrigation Systems

A boom system is made out of one or more pipes with nozzles that apply water as the watering system moves over the vegetation. The boom system can be suspended from an overhead rail system.  It can also be attached to a cart that goes down the aisle.  A trailing hose supplies the water and gets its power from an electric supply cable or battery pack. 


DIY Greenhouse Boom Irrigation Systems

Grower-built systems are the simplest. A tobacco farmer in Connecticut produced the first boom irrigation system. He constructed it by putting seedlings in cell trays. He used a lawnmower frame with a folding, double boom supported above the plants. The cart was guided down the center aisle by the arm riding on a pipe attached to the floor.

This cart was moved by an electric winch mounted on the cart. In operation, the winch cable was unwound and attached to a hook at the opposite end wall. When activated, the winch pulled the cart at an even speed from one end of the greenhouse to the other. A micro-switch halted the cart when it reached the end of the aisle.

This boom cart could be easily moved between greenhouses which was a substantial advantage. With the double boom, the first set of nozzles wet the surface with about one-third the necessary water, and the second set with larger nozzles gave a heavier application.


Hand-Pulled Greenhouse Boom Irrigation Systems

Boom irrigation systems that are hand-held consist of a boom supported by a frame with a trailing hose. These types of systems are popular and have been developed by several successful growers. They can be mounted to an overhead conveyor track system or supported on the ground with bicycle wheels. Although the operation is not as uniform as with a power unit, the savings in time and the more uniform watering offer some advantages.


Commercial Greenhouse Boom Irrigation

Commercial units run about $4,000.  These units can be adapted to work in most gutter-connected and free-standing greenhouses. The widths available go up to 70 ft. For beds and benches 400 feet or less, they can be watered with only one setting. If you have several bays or greenhouses, look for systems that can be moved. 

The commercial boom systems depend on a single or double rail attached to the greenhouse frame. This supports and guides the boom over the vegetation. Even though most boom systems weight under 200-pounds, the system still needs strong support for the trailing hose and attached rail.

Most booms are powered by a variable or fixed-speed gear motor. To allow the speed to vary, a fractional-horsepower DC motor is used by most manufacturers. For either thorough watering or a light mists, you can find rates of 25 to 250 ft per minute. 

For excellent coverage, use cone-spray or fan nozzles. It's a best practice for uniform application to space the spray, so there is overlap in the pattern.    A critical dimension to provide that overlap is the height of the nozzles above the plants. For additional water for plants near the aisles or sidewall, you may need more nozzles at the ends of the boom. 


Adequate Water Flow is Paramount

As with any automatic watering system, adequate water supply is necessary. The wide selection of nozzle capacities available allows booms to be designed to fit most water supplies. Generally, 12” to 15” spacing is used with a nozzle capacity of from 0.1 to 0.8 gallons per minute.

Some systems will operate on water pressure as low as 15 psi, but generally, 40 to 50 psi is recommended for uniformity. To keep the nozzles from clogging, make sure your water is clean. The supply line should have at least one, possibly more filters. The mesh on the screen should be 150 to 200 to get rid of any particulate matter.

Some systems are available with more than one boom. These can be fitted with nozzles with different application rates for misting, feeding, pest control or growth regulator applications.


Methods of Control in Commercial Boom Irrigation

There several viable methods available to control boom systems. The most straightforward set up is to use a time clock or cycle timer that activates the drive unit at predetermined times.

More flexible systems use programmable controllers or microcomputers that allow

  • speed changes

  • skipping of empty bench areas

  • selection of boom sections to activate

  • multiple passes over the same area

Safety and reliability are addressed in several ways.

A variety of sensors may be employed to detect

  • bloom obstructions

  • mechanical problems

  • low water pressure

  • power failure


Advantages of Commercial Boom Irrigation

There are many additional advantages to a boom system besides greater uniformity of water application. Less water is needed because the system can be operated to provide the optimum amount of water for the crop. Less aisle space is needed for watering.

There are a large number of options. Because of that, careful selection of a boom system is required.

Factors affecting your choice include

  • the type and style of greenhouses

  • cropping system

  • water quantity

  • water quality and

  • the amount of automation you desire.

You should shop around to find a system that is most economical for your growing needs.

Get Your Free 15 Minute Consultation Today

 Call 408-332-9635 or contact us online. The team at Voeks, Inc. is here to help you grow.

Greenhouse Mist Systems

Commercial Greenhouse Mist Systems.jpg

What is Commercial Greenhouse Misting?

Greenhouse Mist systems apply water intermittently via mist.  This system is used industry-wide in horticulture and agriculture propagation environments. It improves the success of rooting hardwood, softwood, along with herbaceous stem cuttings and leaf cuttings.


What does a Greenhouse Misting System Do?

  • A well-designed greenhouse mist system produces a fine mist that provides a thin film of water over the cuttings and media. That application results in:

  • A thin “film” of water being formed on the foliage of the cuttings by the fine mist. This film controls moisture loss from cuttings by reducing leaf temperature from evaporative cooling and increasing humidity.

  • The mist enables leafy cuttings to be exposed to higher amounts of light. Rooting is accelerated, and many hard-to-root plant materials are established easier.

  • With mist propagation, there is more flexibility in preparing cuttings. Generally, most types of cuttings will root more readily under mist.

  • Larger cuttings can be rooted with greenhouse mist systems which otherwise would not be possible without mist.


Mist Systems Eliminate The Problems of Over-Watering

A properly designed mist system maintains a fine film of water on the leaves. This topical misting method uses the optimum amount of water, not too much or too little. It also eliminates the problem of excess water that leaches nutrients from the cutting and the rooting medium.

Excess water can saturate the growing medium. That can significantly reduce the amount of air in the medium.

Excess moisture at the bottom of the cutting restricts a good supply of air necessary for rooting. The amount of water can be reduced by using a fine mist nozzle along with the use of an intermittent mist.

The use of intermittent mist, which is appropriately sized and controlled, is the best solution to prevent over-watering.


Common Greenhouse Mist System Applications

Greenhouse Mist systems are capable of a broad spectrum of applications. The most common use is propagation, in conjunction with micro-climate benchtop heating. However, most systems can be modified to apply to a variety of applications such as:

  • Greenhouse crop chemical applications

  • Application of insecticides, fungicides, and herbicides

  • Greenhouse floor sanitation

  • Dust control

  • Odor reduction in food processing

  • Odor reduction for composting

  • Cooling

  • Humidification


Why Use a Professional for Greenhouse Misting?

Greenhouse Misting: Importance in using a professional for your installation:

For the best results, it is vital to have an industry professional involved with the design and installation of your greenhouse mist system. Voeks Inc. has designed and installed over 100 complete misting systems for propagation environments. We are here to help you avoid common pitfalls like: 

  • Over-spray is going onto walkways and walls. That overspray increases pathogen transmission and promotes algae growth. 

  • The over-saturation of the root zone which is a dangerous plant destroyer. 

  • Selecting the wrong controllers that aren't compatible with your specific propagation methods. 

  • Selecting incorrect nozzles. These can cause the mist to keep dripping even after the station is turned off. This is important because a large drop can kill a  small cutting.

  • Greenhouse mist systems can over-water trays if the heads are patterned in a typical “overlap” method used in sprinkler irrigation.

  • Incorrectly setting the pressure on the regulator selection resulting in flow rates that do not meet the misting emitters flow rate specifications.


Get Your Free 15 Minute Consultation Today

Call 408-332-9635 or contact us online. The team at Voeks, Inc. is here to help you grow.

Drip Systems

Commercial Greenhouse Drip Systems.jpg

All About Greenhouse Drip Irrigation   

What is greenhouse drip irrigation? It is a water delivery system in which water is applied drop by drop - slowly. The water is sent to the soil at the base of the plant. When your drip irrigation system is thought out and designed correctly, you don't have to wonder about how much water to apply. By the use of soil saturation sensors, water is applied when the soil is too dry and not at the correct moisture level.

When you want to accurately gauge and control the amount of moisture in your commercial greenhouse, an automated greenhouse drip irrigation system is the way to go. It's an exact and simple method that applies water by sensing the needs of the soil. Growers save time, money, and it's incredibly accurate. It takes out the guesswork and human error. 


Why is Available Soil Moisture Important? 

Greenhouse Drip Irrigation: Available Soil Moisture

 The productivity and growth of plants are determined by how much moisture is available in the soil. The current moisture level can be determined by:

  • soil and plant appearance

  • signs of wilting in leaves

  • signs of stress of succulent terminal leaves

  • dry soil that won't compress in your hands

Even before there is a visible lack of water and plant wilting, lack of moisture can be harmful to plants. Water deficiency can result in:

  • slow growth

  • underweight fruit

  • end rot in tomatoes

With correctly designed greenhouse irrigation, you can replace the less than accurate and time-consuming traditional methods and maintain optimum moisture levels for your soil. 

Conventional irrigation methods usually wet the plants lower leaves and stems. The entire soil surface is saturated and often stays wet long after irrigation is completed. Such conditions promote infection by gray mold-rot (Botrytis) and leaf mold fungi.

With the more traditional irrigation methods, lower stems and leaves on plants are watered more heavily. That results in over-saturation of the entire area of soil and promotes leaf mold fungi and gray mold-rot. 

At 10 to 12 inches deep within the soil, most greenhouse vegetables remove large amounts of water. That is a critical depth when gauging moisture and cannot be determined accurately by testing the top couple of inches of the dirt.

Also, evaporation and transpiration are everyday occurrences in greenhouses on sunny days. That can result in excessive moisture loss and damage to the plants even when enough moisture is added back. This type of water stress, no matter how intermittent or slight can cut profits because of low harvest weight. 


How Efficient is Greenhouse Drip Irrigation? 

For commercial irrigation of

  • crops

  • landscapes

  • gardens

  • trees

the drip method is the most efficient. When your drip system is well-designed, your efficiency can go to almost 100%. Compare that to other types of overhead irrigation such as pop-up spray heads and rotors which have an efficiency of only 50% to 70%. 


What are the Benefits of Greenhouse Drip Irrigation?

Saves time & money

  • Installation and maintenance costs for a greenhouse drip irrigation system are typically much lower than an underground sprinkler system. They are often exempt from watering restrictions because of their efficiency. Be sure to check your local rules and restrictions.

  • Greenhouse drip irrigation systems operate at pressures between 15 and 30 psi, eliminating the need for a booster pump in low-pressure systems.

  • In a greenhouse environment, large areas can be watered all at once because of its low flow rate.


CUSTOMIZAble & precise

  • No more under-watering or over-watering, plants get just the amount of water they need.

  • Drip irrigation works well for many locations, terrains, crops, and soil conditions.

  • The flexible system is easy to change as plants are removed or added.


Saves Water & Eco-Friendly

  • Greenhouse drip irrigation uses less water since water is delivered only to the plants that need it.

  • Evaporation losses are low with greenhouse drip irrigation systems, especially when used along with mulching.

  • For windy open-air conditions, it works much better than sprinklers. And it has advantages over horizontal airflow sprinklers in greenhouses.

  • Drip irrigation in a greenhouse environment reduces and has the potential to eliminate pollution from runoff.


Fewer Weeds & Disease

  • Drip irrigation creates fewer weeds because the area between plants is not irrigated.

  • Greenhouse drip irrigation reduces the incidence of foliage diseases.


Healthier Plants

  • Drip irrigation improves plant health by delivering fertilizer, and other chemicals precisely where they are needed.

  • It improves plant health by reducing fluctuations in soil moisture.


What Can You Expect? 

  • Save time by not having to manually control the irrigation systems or spend excessive amounts of time checking on moisture levels.

  • Instead of water spraying into the air, it's applied directly to the soil. That method keeps leaves and stems drier.

  • There won't be water collecting in puddles or splashing around because it is applied at the correct rate so it will percolate into the soil.

  • Fewer foliage diseases such as gray mold-rot or leaf mold.

  • Since the soil surface stays drier than with spray methods, there is less fruit deterioration and evaporation loss.

  • If everything else is in place and there are no limiting factors, there can be increased production.

Get Your Free 15 Minute Consultation Today

Call 408-332-9635 or contact us online. The team at Voeks, Inc. is here to help you grow.

Micro Spray Irrigation

Mist Systems

What is Greenhouse Micro-Spray Irrigation?

Micro-spray is a combination of drip irrigation and surface spray irrigation. So, of course, it has both the disadvantages and advantages of the two systems of irrigation.   Micro-spray generally operates with pressures between 15 and 30 psi. So, like drip irrigation, it is considered a type of low-pressure irrigation.  It is usually regarded as low volume with application rates of 5 to 70 (gph) gallons per hour or (18.9 Lph - 264 Lph).  

Micro-spray is well suited for spraying: 

  • ground covers

  • large flowerbeds

  • sandy soil

It typically creates a larger wetted area then drip irrigation. 


How is Micro-spray Delivered? 

Water is sent through microtubing and into a series of nozzles. These nozzles are attached securely to the risers. Depending upon your specific needs, risers can be designed to pop-up or be fixed in place. In either case, this type of irrigation has a significate advantage because it is easy to see that the nozzles are functioning. This gets rid of the common complaint of not being able to see if drip irrigation is working. 


Factors to Consider with Greenhouse Micro-Spray

As we talked about above, a greenhouse micro-spray system provides several of the same benefits as drip irrigation. Now we'll take a look at a few of the disadvantages. 

•    Because this type of irrigation puts out a higher volume of water than traditional drip irrigation, it may not be exempt from watering restrictions. 

•   Greenhouse micro-spray may not be the best for all climates. In windy conditions, there can be a disruption to the flow pattern of the water. And in extreme heat, there can be losses from evaporation. 

•    Overwatering can be a problem because of the higher flow rates. Add to that the problem runoff. But, in some climates or circumstances, this wouldn't be a concern. 

•    And you have to take into consideration weeds. When there are more wetted areas, more weeds grow. 


Get Your Free 15 Minute Consultation Today

Call 408-332-9635 or contact us online. The team at Voeks, Inc. is here to help you grow.


Ebb and Flow Irrigation

Ebb and Flow Irrigation.jpg

What is Ebb and Flow Irrigation? 

Ebb and Flow irrigation originated from the world of hydroponics. In the traditional hydroponic ebb and flow systems, containers are filled with a growing medium that is inert. The medium does not function like soil, meaning it is not part of the nutritional delivery process to the plants; it simply has the function of anchoring the roots and functions as a temporary reserve of water and solvent mineral nutrients. A fertilized solution alternately floods the system and proprietary valves on the flood trays allow the solution to drain at rates customized by the grower.


How Does Ebb and Flow Irrigation Work?

Ebb and Flow system work by intermittently flooding grow trays. Grow trays come in a variety of types. Trays exist that sit on top of greenhouse benches, or there are full commercial lines of ebb and flow benches (the entire benchtop itself is a tray or series of trays).

The trays are flooded with a nutrient solution that is pumped from a solution tank. The flooded tray drains the solution back into the solution tank but at a slower rate than it is filled, through the use of proprietary valves. This action is normally done with a submerged pump that is connected to a controller. When the controller turns the pump on, the nutrient solution is pumped into the grow tray. When the controller shuts the pump off, the nutrient solution flows back into the reservoir.

 In order to prevent pathogen buildup, and to ensure that the fertilized solution continues to deliver the intended nutrients, it is essential to drain or purge the solution tanks on a schedule that fits your growing plan. Voeks Inc. provides design and installation for all types of purging systems that adhere to local water quality control board mandates.


Hydroponic Growing Method and Its Drawbacks

You can use ebb and flow systems in conjunction with traditional hydroponic growing practices. However, there are three things to keep in mind as far as drawbacks and limitations:

  1. The nutrient delivery process is 100% based on the fertigation solution
  2. Along with the growers understanding and maintenance of that solution
  3. Also, the solution will require stringent control of EC, temperature, PH, and nutrient concentration.


Flexibility with Soil-Less Media

Voeks Inc. in conjunction with growers has had success in designing and installing ebb and flow systems that do not fall within the typical structure of hydroponic growing practices.

Using soil-less media for example peat moss of different textures with a base nutrient charge allows incorporation of dry fertilizer. This growing practice can be planned and constructed to act as a back-up in regards to nutrient charge and buffering. This translates into needing not as perfect fertigation. 


The Ideal Fertigation

For complete fertigation, there needs to be a redundancy of the combination. For example:

  1. a good peat-blend soil-less media,
  2. with a light dry fertilizer amendment,
  3. plus continuous liquid feed via low concentration

That redundancy can give flexibility to growers. So when, for example, your stock tanks runs out on a Saturday, the plants are fine until Monday because the soil is holding more nutrients.

This growing method does require however attention to design detail. Using relatively smaller particulate growing media needs to be managed by the implementation of plumbing, to prevent clogging of ebb and flow drains, and media buildup in solution tanks.


Contact Voeks, Inc. today for a free consultation about your commercial ebb and flow irrigation system. 


Greenhouse Sprinkler Irrigation

Greenhouse Sprinkler Irrigation.jpg

Greenhouse Sprinkler Irrigation

Greenhouse Sprinkler systems, much like the ones you typically see on a football field or neighbor’s lawn, allow you to water a very large area at once. These systems give you more control over your crops because you can decide where to water and when to do it. Sprinklers can be used by themselves or in a circuit, depending on the size of the area you are looking to water.


Where Can I Use Greenhouse Sprinkler Irrigation? 

Greenhouse Sprinklers can be installed inside a greenhouse or high tunnel. But, they are also great for irrigating fields, gardens and commercial landscape. Sprinkler systems can be customized to water only a few crops with one sprinkler head. Or, systems can be created to water entire fields with a series of sprinklers.


Advantages of Greenhouse Sprinkler Irrigation

  • Sprinklers can water large areas all at once and save time.
  • Sprinklers give you independence from the topography of the area.
  • Sprinklers allow you to irrigate with no need for channels.
  •  Sprinkler heads have larger emitter orifices than other irrigating methods. This makes sprinkler irrigation less susceptible to head clogging compared to drip irrigation.
  • There are excellent possibilities of irrigating for other purposes such as sprouting, frost protection or cooling during hot periods.


Disadvantages of Greenhouse Sprinkler Irrigation

  • The primary disadvantage to sprinkler irrigation, in comparison to drip irrigation, is that it wastes water.
  • On average, 20% additional water is needed in order to guarantee the net dosage for the entire crop.
  • Greenhouse sprinkler irrigation can sometimes cause high operational expense, due to the energy needed for pumping. Successful sprinkler irrigation depends on high pressures and velocities of water.
  • Sensitivity to wind can cause evaporation losses.
  • There is the unavoidable wetting of foliage in field crops results in increased sensitivity to diseases.
  •  There are problems inherent in irrigating tall crops or fields through which equipment has to pass during the irrigation season (e.g. pastures).
  • Fertilizers and pesticides are often flushed out.


 Contact Voeks, Inc. today to find out how we can help you with your commercial greenhouse sprinkler irrigation.